Showing posts with label workshop. Show all posts

8.13.2013

summer printmaking workshop

I wanted to share a bit of the projects I made with my kids during my summer printmaking workshop with Arts Outreach. Like the bookmaking workshop, I used a lot of projects from previous workshops or lessons. Luckily, I had a really good group of kids and a much smaller class compared to last summer, so I was able to be a little ambitious with our projects! Our schedule for the week was:
  • Monday: styrofoam box embossed printing
  • Tuesday: linoleum and cork carving, and puffy paint/CD prepping
  • Wednesday: printing day for linoleum carvings and puffy paint drawings
  • Thursday: veggie printing, potato carving & making screens for boot-leg screen-printing
  • Friday: print their screens on fabric
It was a hectic and messy week but it was really fun! Because of the dangers of carving linoleum with little kiddos, I didn't manage to get any photos from the carving day. Fortunately there were no lost appendages, so you really didn't miss much! There were a lot of reoccurring designs this summer, lots of Ben 10's, mustaches and I even vetoed the use of "YOLO" on one day. 
Chelsea: 1, Pop culture: 0!

7.29.2013

summer bookmaking workshop

Last week was an absolute blur. Between filing paperwork then running from the pool to the school, if you had asked me what day of the week it was I would probably have responded with "accordion book day." During summer workshops, my days of the week are distinguished by what the project is for the day. Our week's schedule was:
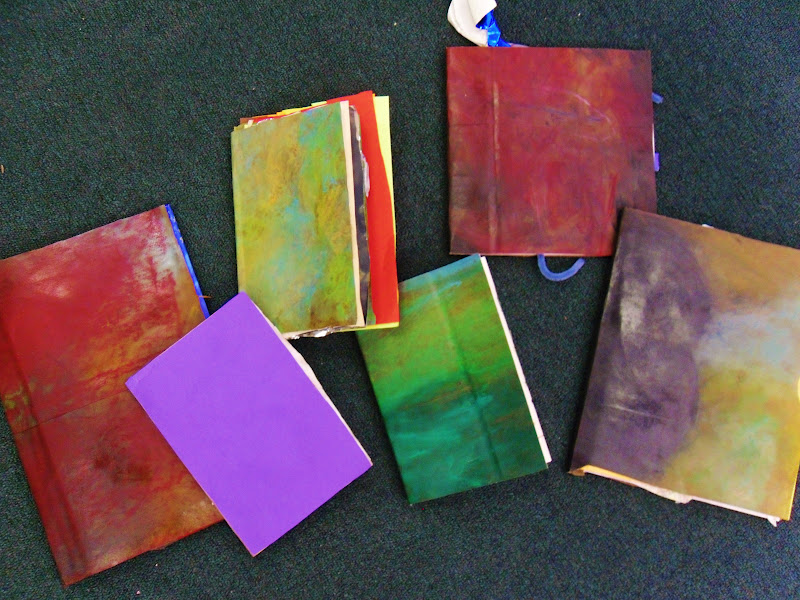
  • Monday: mini paper bag books & baby oil and oil pastel on paper bags for our altered book covers
  • Tuesday: Mini accordion watercolor books & start the altered book project
  • Wednesday: Coptic binding basics
  • Thursday: Black/white nature print book with rubber band/paper clip binding
  • Friday: finished altered books
Every day we worked on their altered books a little more too. This group was really great and super eager to learn new things! What really surprised me was how much they enjoyed the altered book project. In some other classes that I introduced this project, it was like pulling teeth to get them to even write their name in the book. With this group, everyday they couldn't wait to break out their books, even going so far as printing out photos and bringing in their own supplies to add to their books. It was so much fun to walk around and see them playing and experimenting with their books!

I did a lot of these projects for last year's workshop, and others are from classes I taught during the school year. I didn't really get a chance to take any photos during the actual process of making them. I might do some in-depth posts about how to make some of the new projects but here are some photos from my week of bookmaking! Psst...this week is printmaking!!!
Monday: mixing baby oil and oil pastels on paper bag panels
Monday: mini paper bag notebooks
Tuesday: mini accordion watercolor books
Wednesday: Coptic binding basics
Thursday: nature printing and rubber band/paper clip binding
This day was the most messy!
Friday: altered books! This girl's altered book was really fun! She had pages of paper cut out scenes

7.27.2013

lately via instagram

Oh man, this week was a doozy! I taught swim lessons every morning then ran over to a nearby school to teach my bookmaking workshop. Then throw in a really nasty cold, a quick Van Halen concert and some house-sitting and that about sums up my week! 
1. The final bow at Van Halen's Mid State Fair concert! Our aunt is friends with Alex Van Halen's wife and was able to snag us some free (and killer) seats! It was a pretty incredible show...
2. From the first day of my bookmaking workshop. I had 10 really sweet kids this week. I'll be sharing my lesson plans and their projects soon. 
3. They were also very efficient at making enormous messes! We spent the last half of class everyday working on Altered Books...which made for a gigantic mess every day! But they really loved their projects at the end of the week.
4. I'm also house-sitting at the moment. One of my favorite things about this particular house is the cats. I wake up every morning with at least one or two cuddling with me. Makes me miss owning my own cat...

Now off to do more business work! This weekend will be filled with sketching out plans for clients, working on my own re-branding and opening a business bank account today! What's on your agenda this weekend?

3.20.2013

shrinkie dinks from to-go boxes

You read that right...shrinkie dinks from to-go boxes. To be exact, #6 plastic to-go boxes. I've seen this all over Pinterest and the interwebs lately but I've always been skeptical of it. But I really wanted to try it with my kiddos for my up-cycle/re-cycle workshop. 

I managed to score a donation of plastic to-go boxes from my local market (my thinking, even if they don't work then at least they were free!). I cut out all the flat square panels from the top and bottom of the boxes for the kiddos, so in class all they had to do was draw and cut out their shapes. Then a quick 3 minute cook in the oven on a tin-foiled cookie sheet at 350*...and guess what...they really freakin' work! Just like the shrinkie dink kits! They were fun to watch because they curl up as they shrink then flatten out again just as they're finishing cooking. 

I made one to test out first, just in case these turned into a burning mound of melted plastic...
Shrunken! This is now on my keychain! 
Some of the kiddos' before...
And after! 
Loved this one! She made 4 little scenes on the big piece then cut them out and they still fit together after they shrunk! 

I got a little ambitious and tried shrinking half of a box whole...didn't go so well...

3.09.2013

recycle printmaking with styrofoam boxes

The clean ink slabs...before the children descended...
I started a new after school workshop with Arts Outreach two weeks ago, Upcycle and Recycle Art! An entire class about what I love doing already! I'm so excited about this class, I've been gathering ideas for quite some time and I'm happy to finally be able to try all these projects with the kiddos. 

The first week with the kiddos we made/bound cereal box and paper bag notebooks. I was unable to get any photos from this project but it was a combo of this project I found for the covers/binding with my paper bag notebooks from last year for the insides. I chose this project to gauge the level of the kids...luckily I did too. Turns out my class consists of 14 kids, with about half of them being 6 or 7 years old...with one 5 year old. This isn't to say I don't have a very talented bunch of kids, because I do! This is a fantastic group. But...it does mean that there's a lot of kids that need help/assistance every step of the project...which makes my one hour with them very hectic and in constant motion...

So this week I wanted to try some recycle printmaking using styrofoam to-go boxes!  I may have looked like an absolute fool hauling around 3 dozen styrofoam to-go boxes but it was completely worth it. I was inspired by this post from Alisa Burke's amazing blog! She used scratch board for her project but I thought styrofoam boxes would be a perfect substitute. 

To make these, all you need is: a styrofoam to-go box, an exacto blade, a pencil or paintbrush, paper to print on and ink/supplies for printing (paint would work too).

Cut out the large flat square piece from the base and lid of the box, these will be where you'll be making the designs to print. Using a dull pencil or the non brush end of a paint brush, draw your designs on the styrofoam. The opposite end of paint brushes worked best for my kiddos, it was big/strong enough to make a deep impression but not pointed enough to poke through the foam. Remind your kids that if they want to write anything that it must be backwards ...which can be used as inspiration I guess...
My favorite from the whole day! 
Time to print! I set up ink slabs like I did last summer for my printmaking workshop using foil and tape but paper plates of paint with brushes would work just as well. Ink up the designs enough so that the whole thing is covered but not so much that all the grooves from the designs are filled in. Then flip it over, center it on the paper and rub evenly across the back of the foam. Then slowly remove the foam and voila! A print! We had enough time for the kids to print 2-3 designs and it seems like they really enjoyed it! 


7.21.2012

bookmaking workshop: kiddo version!

This week I taught a bookmaking workshop with Arts Outreach to nine little kiddos, from 7 years old to 12. Overall, it went really well! The kids were really enthusiastic about all the projects and making books! I wish they were all a little older though so I could teach them some more complicated binding techniques. Because teaching binding to little guys can be hard! 


I tried to take more photos this workshop too. My other two workshops, weaving and printmaking, were pretty poorly documented. There may not be many photos of this past week, (if a workshop is never photographed, did it ever really happen?) but at least there are some!


My favorite bits are all the titles they came up with, and all their spelling errors. I'm an obsessive speller but I'm so entertained by little guys spelling mistakes. 


I started off the week with making my little paper bag notebooks. Great way to introduce them to binding, especially since it's a really easy one and requires very few complicated or expensive materials. Just some paper bags, scissors, glue and clamps! And little fingers to smear the glue into all the cracks along the spine. 


We also bound some abstract books. I had the kids cover pieces of paper, front and back, with random collages of papers and drawing. Then we cut them up into pages, leaving the final result of the book a surprise until it was fully bound up. This was another easy binding, the good 'ol rubberband and paperclip technique! 


I wanted them a learn a really easy real binding method as well, so I taught them a basic 5 hole bind on another day. They loved it! (after a few knots and tangles of course) Most of the kids made more than one book this day, including mini books. These were probably their favorite to learn. One girl make a second one and started embroidering the cover. 


The big project for the week, and my favorite, was the altered book project. Like other times I've taught this, I first had the kids use baby oil and pastels on a big panel from a paper bag and just cover it in color. Once it soaks in a bit and I spray it with some sealer, the paper takes on a colorful leathery look. We used a bunch of old books of my sister's collection and used those as our canvases to rip/destroy/draw/paint/collage/sew etc! These were my favorite products from the class. I think the kids enjoyed it too, having the opportunity to freely destroy and alter a book to their liking. It took them a little bit to get used to the idea that they could draw on any and every page and it was allowed! 


7.05.2012

Printmaking Workshop: woodcarving

I am terrible at documenting my art lessons. I was stoked to share my kids work and then had the disappointing realization that I had not taken many photos. The classes moved too quickly to remember to grab the camera. Since it was a morning class, the kids also took their work home in the afternoon, thereby stealing my opportunity to document it the next day! 


Due to the lack of photos, I would like to try to recreate the puffy paint printing at home first so I can post more about that one. Fortunately I was able to snap a handful of photos on the woodcutting day! 


On to business!  Okay...Woodcutting + small children = a TERRIBLE IDEA (usually)
But, with the addition of fresh carving tools, small groups at a time and baby oil, what could have been a bloody bloody mess was actually a very fun day for the kiddos and me!


When I was at school carving on BC plywood, we all learned baby oil was our best friend. It made poor quality free plywood cut like butter. A glorious thing when you're carving a 6' x 6' chunk of wood! 

I had the same approach to working with the kiddos. Albeit they had nicer quality and softer wood, I still soaked their slabs in a bit of oil to make it a little easier for them to carve. I also did this to give our linoleum carving tools a smaller beating. Actual woodcarving tools were unavailable and too expensive but I was able to procure a few new linoleum carving sets. So even though it was a bit more dangerous carving with sharper instruments, with the combo of a fresh blade and baby oil, the wood cut smoother and the skipped along the grains a lot less. 

Just like the foam paper printing, it took them a little bit to grasp that the words needed to be backwards but once they transferred them to the wood it made more sense. Their images were pretty simple of course but it was still a lot of fun to see what they came up with. One little boy kept adding to his carving. By the end of the class his print boldly stated, "Jack is AWESOME!"