

It fits perfectly in my back pocket and is the same size as my mini moleskines so they're always with me. Even better, they're super easy to make. Even even better, you're up-cycling a paper bag in the process so it's a win-win for me!
And so, how to make them! You will need:
-a paper bag (or a few if you want lots of pages)
-exacto blade or scissors
-a ruler
-clamps or clips
-glue (normal Elmers will work, I used PVA glue...the bookmaker in me just won't die)
- a paintbrush, to apply the glue
-colorful tape
-a weight or something heavy
optional: a bone folder, other scraps of paper

Next, dismantling of the bags. Pull the handles off gently. You can still use the main panel (for extra pages, or as paper bag folders!)
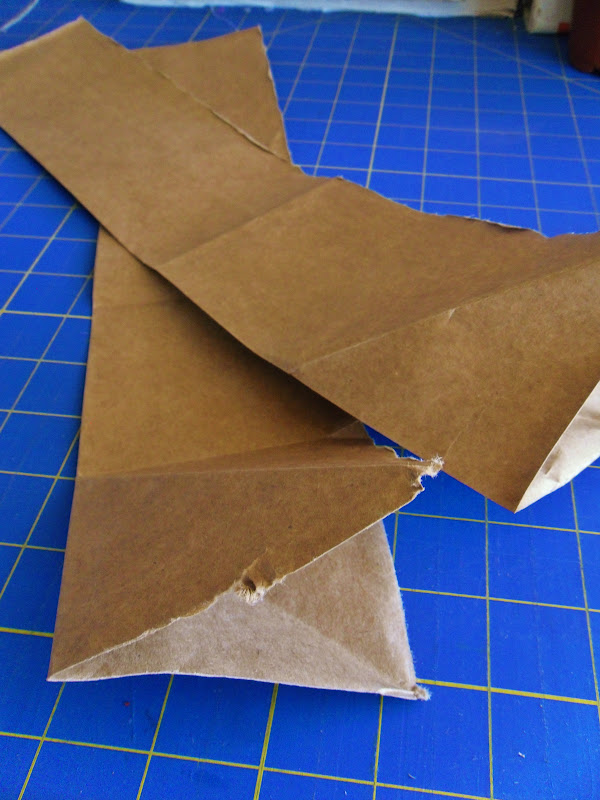
Then take your blade and cut out the 2 side panels, the long narrow panels with the fold in the middle. I find it easiest to slide the blade along the 3 folds of the bag that make up the edges of the side panels.


At this point you should have the 2 side panels cut out and a long piece made up of the large panels still attached to the base. If you want your notebook to have a lot of pages, then cut a few more panels from other bags or use the front panels!
Now the two side panels are already mostly folded. Take the bone folder (or a hard edge from a credit card or ruler) and push the crease down the whole length of the bag.

With the panels still folded, measure out the size of your pages. I measured mine to be 5 inches long, so I was able to get 3 pages per panel. Then cut them out while they're still folded. If you want to add more pages using different papers, use one of the paper bag pages as a template for cutting out the extra pages.


You have your pages! Stack the pages and line them up so the folded edges are all together. Time to bind it up...


Take your clips and clip all the pages together at both the top and bottom of the book, keeping the folded edges lined up! If the pages aren't all the same length exactly, you can trim them down later to make them even. But first, gluing...


Using your paint brush, liberally apply glue to the clamped edge of the notebook. Dab at it with the brush to get glue into the crevasses. While it's sitting, keep a weight on it to make sure the pages glue together flat. I used a bookbinding weight but a stack of books would work as well. Let the glue sit for awhile then apply some more, 2-3 times in all for good measure
Now the hard part. Waiting. I'm one of the most impatient crafters. But you must wait for the glue to dry entirely! An hour minimum, or even overnight if you have some killer patience skills.
In the mean time, you can pick and cut out the paper for the cover!
Once the notebook spine is all dry, attach your cover papers. Take a strip of colorful tape and lay it flat across the spine. Gently fold it over the edges so it is partially on the front and back, while still covering the whole spine. Trim off the extra tape. If you want all the pages to be even, use your ruler an blade to trim them down.

Now you can decorate! Write on the cover! Add stamps! Use scraps of old artwork! Maps! Hearts! Anything!
Then you're all done! You have a handmade mini notebook to jot down all the random musings, grocery lists, books you need to read and to do lists!

(The giveaway for these babies is now closed! Thanks to the lovely ladies that entered!)
Love this idea and your illustrations!
ReplyDeleteI commented...see here...I follow your blog....and I liked you on facebook....does that mean I get multiple entries? Bonus points because I have liked your art since the 7th grade, right? ;)
ReplyDeleteI seriously think you are amazing. Love this idea!!
ReplyDeleteAlso, you have been Facebook LOVED (and liked :)
ReplyDeleteAww Chelsea! these are so cute. I'm totally going to try my hand at making one sometime! ALSO I WANT TO ENTER! This is me. Entering. Also I totes follow you on facebook already, so I don't think that quite counts.
ReplyDeleteAnother great idea! Love it, thanks for sharing!
ReplyDelete-Molly
www.justalittlecreativity.com
Thanks so much Molly! :)
DeleteThank you so very much, Chelsea! I just ran across your blog, accidentally, really, and I love it! I love your art . . . and your gypsy ways . . . I pinned this tutorial just now so I can refer to it later, but wanted you to know in case it's not okay. I will remove it right away if you like. http://pinterest.com/pin/4996249558201734/ Thank you so much for sharing!
ReplyDeleteHello! It's quite alright, thank you so much for checking with me though! I hope you enjoy making them :) Thank you for all the kind words too!
DeleteThis is such an inventive and practical way to make notebooks.
ReplyDelete